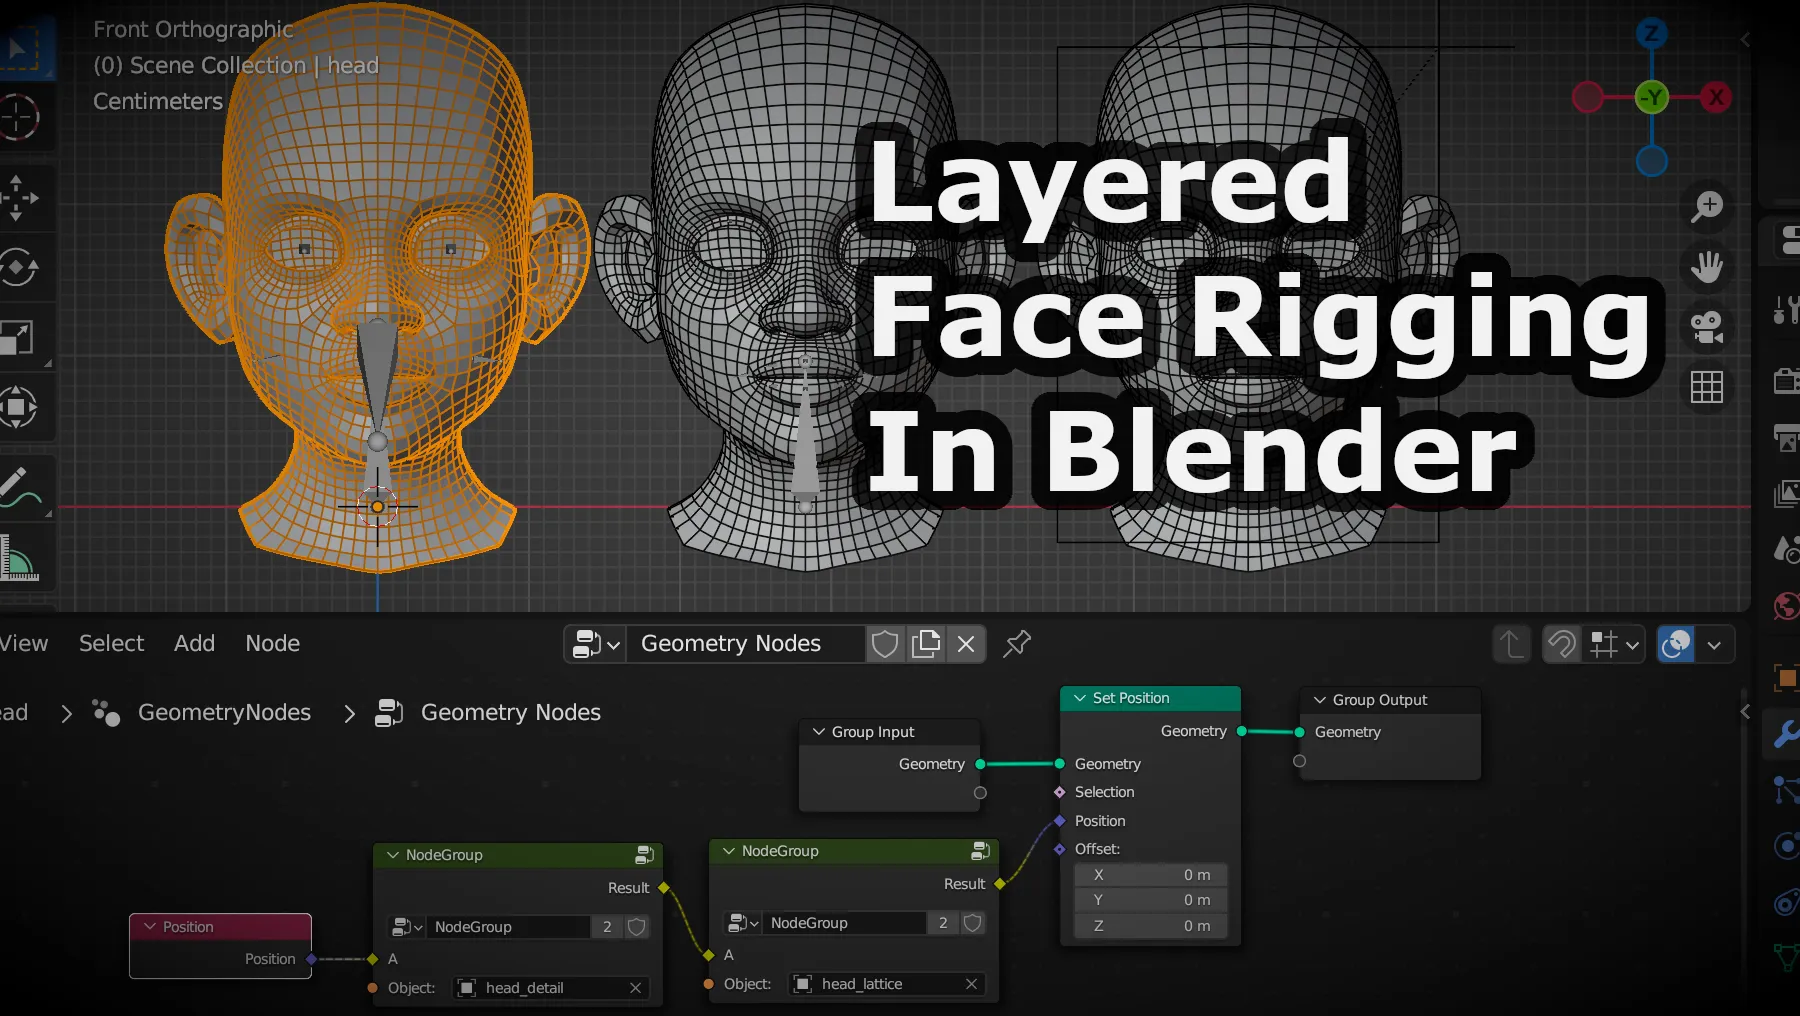
Layered Face Rigging In Blender
Create live blendshapes in Blender using geometry nodes
Live blendshapes in Maya or morph targets in Max have been a common rigging practice for long time. Live updates on shape targets allows riggers to create more complex and flexible rigs by layering rigs. It means you can rig each shape target independently and combine them as one facial rig on main face mesh, all without needing complex setup typically required when working on a single mesh.
Unfortunately blender shape keys doesn’t support live update from source shape targets. It only stores 3d coordinates of each shape key inside the main object. But with the recent geometry nodes feature, we can now add different meshes as live sources and create rig layers.
Basic Setup
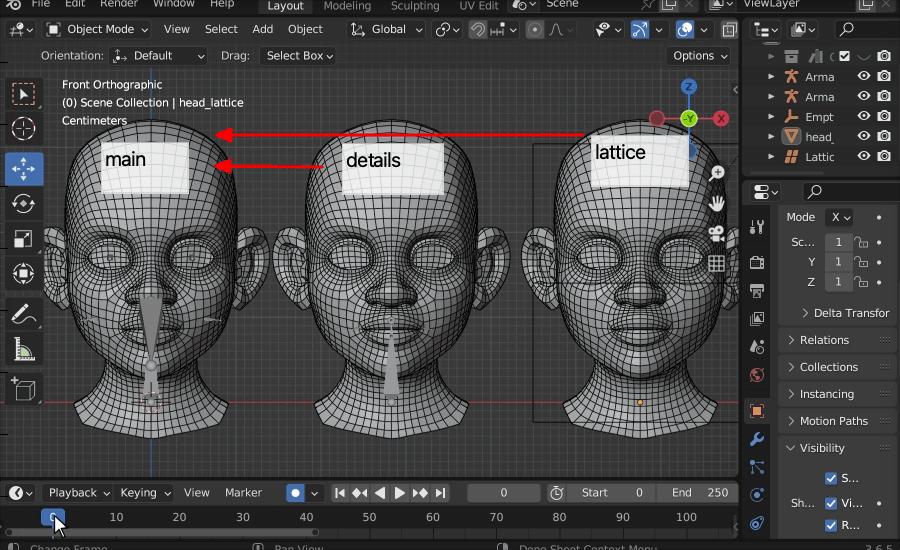
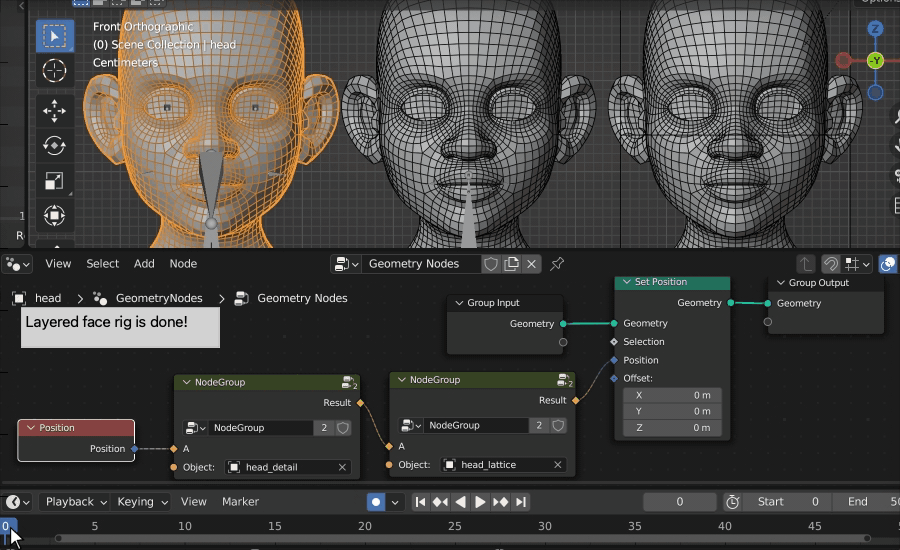
We’ll try to create 3 layer face rig. On the original mesh, we will control general areas of face and go into details on second mesh and have lattice on third one. You can find tutorial files here. See gif below to get the idea.
Geometry Nodes
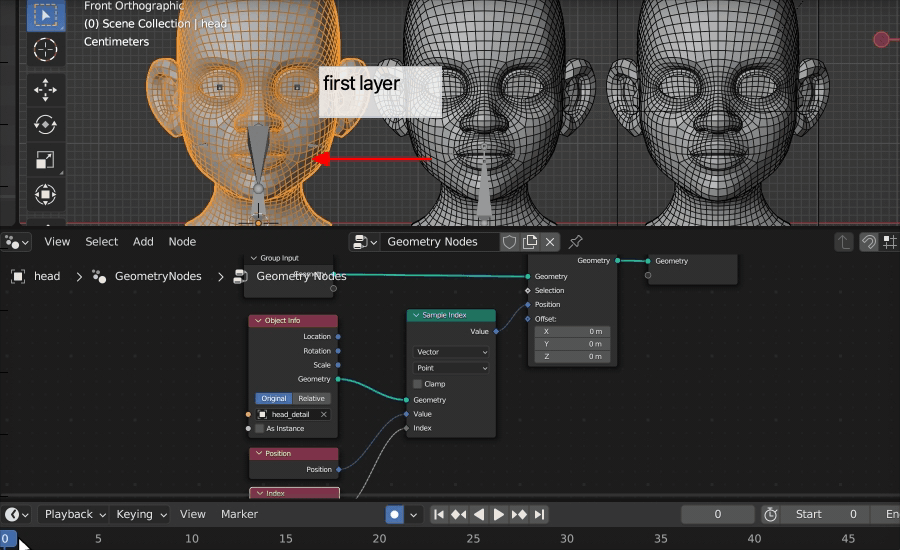
We add a geometry node modifier to main mesh from modifiers tab then create first layer as shown below image.
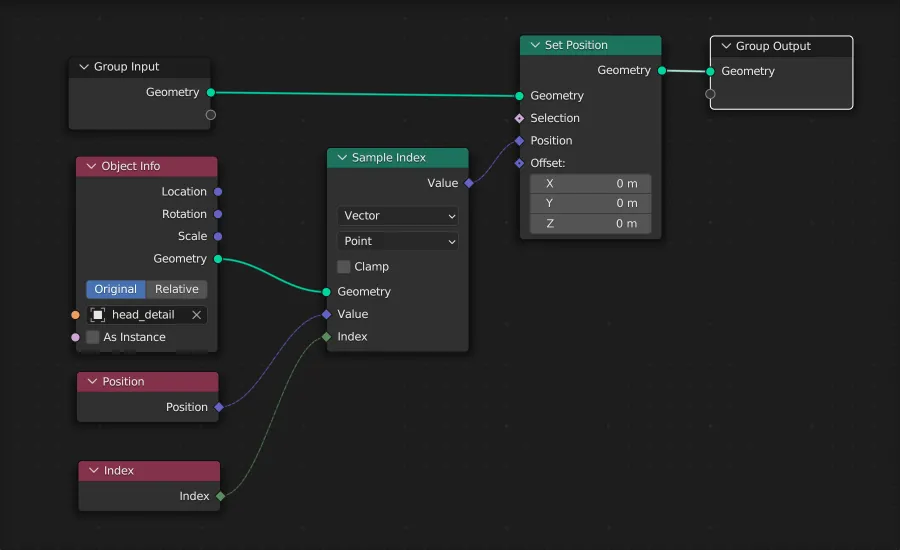
It’s a simple graph, we get vertex positions of second mesh from ‘Object Info’ node and set to original mesh. See the result gif below.
We repeat same steps for second layer for getting its vertex positions. Then we use ‘Mix Color’ node to add those two source mesh vertex positions together. But there is one caveat, since we add both positions together, main mesh will be twice as big. To prevent this we subtract original mesh vertex positions at the end. So we only receive changed positions from source meshes. Check graph below.
å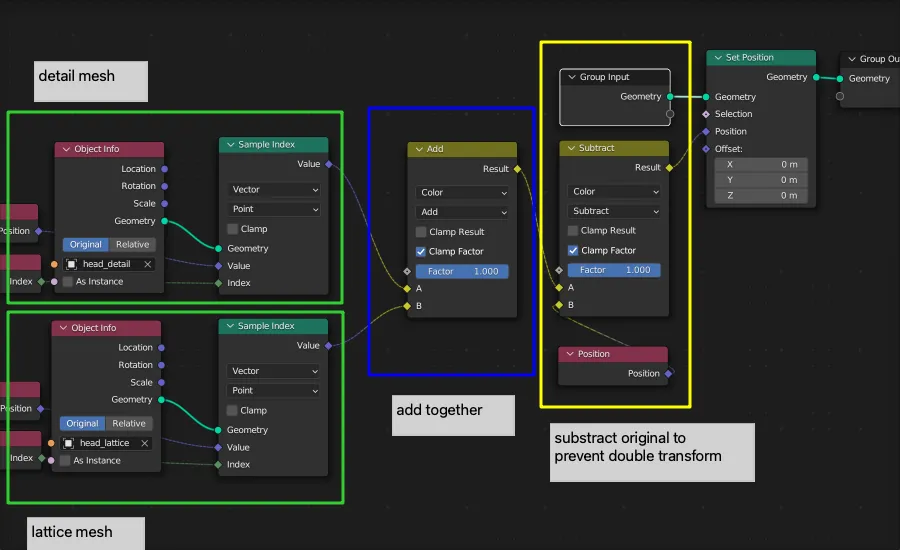
Second layer result well be as in the gif below.
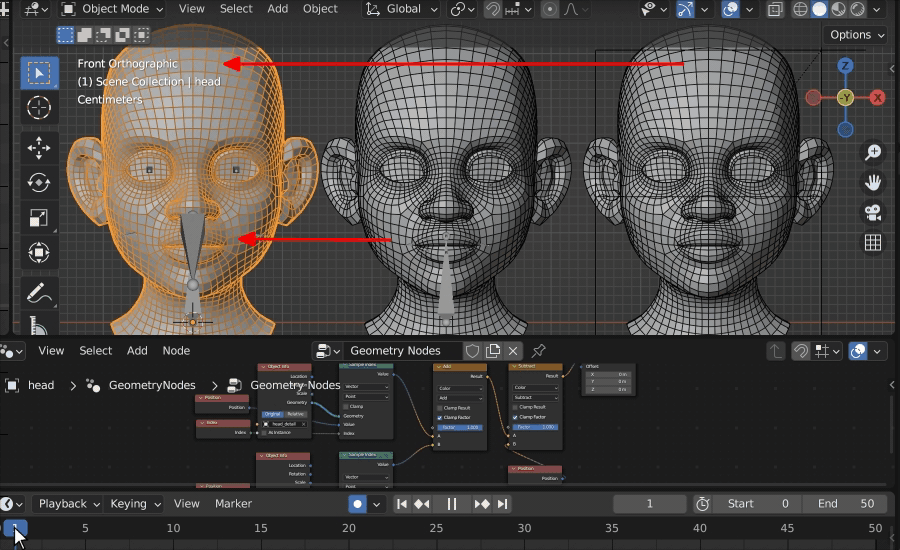
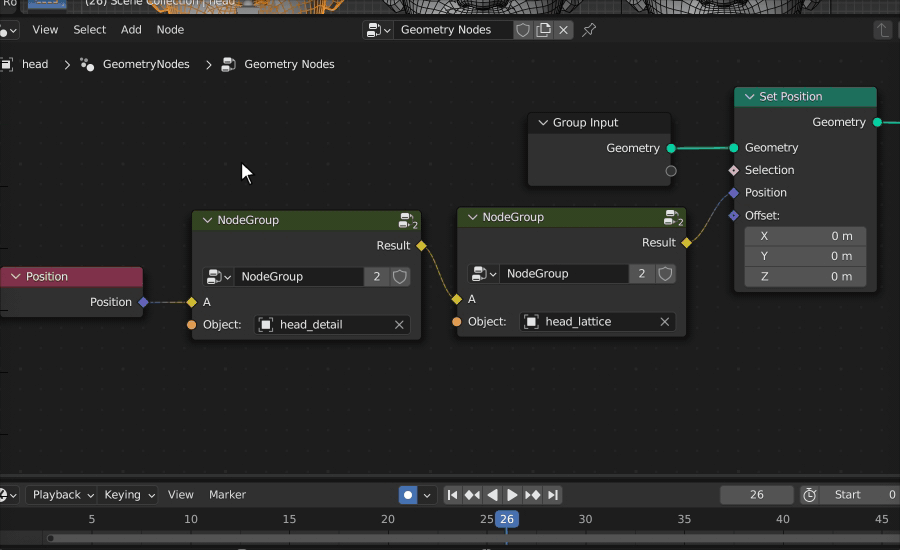
Done! We successfully added 2 layers to our face rig. Some of you may see a pattern here. Instead of creating and connecting all those nodes for each layer, we can make it modular by grouping layer nodes. See gif below.
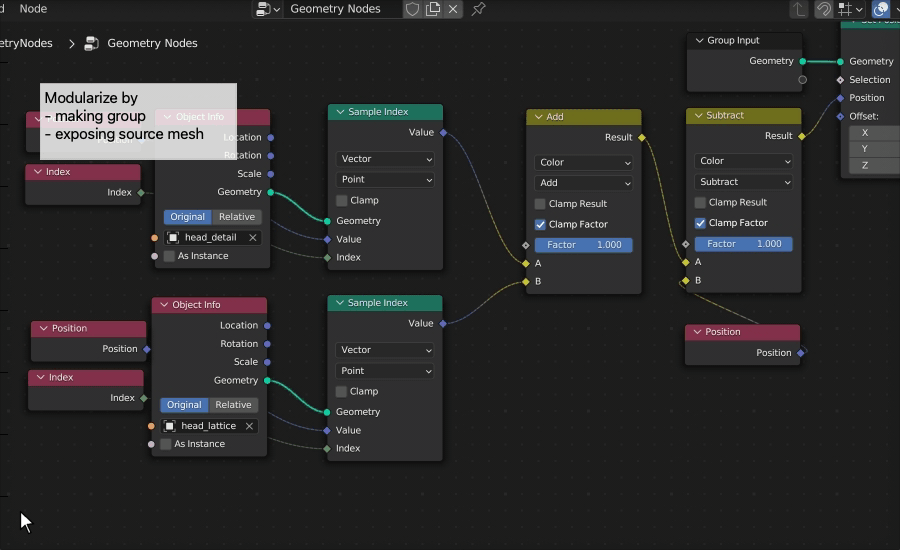
After grouping layer nodes, we can expose the object input so we can easily assign layer meshes from group node.
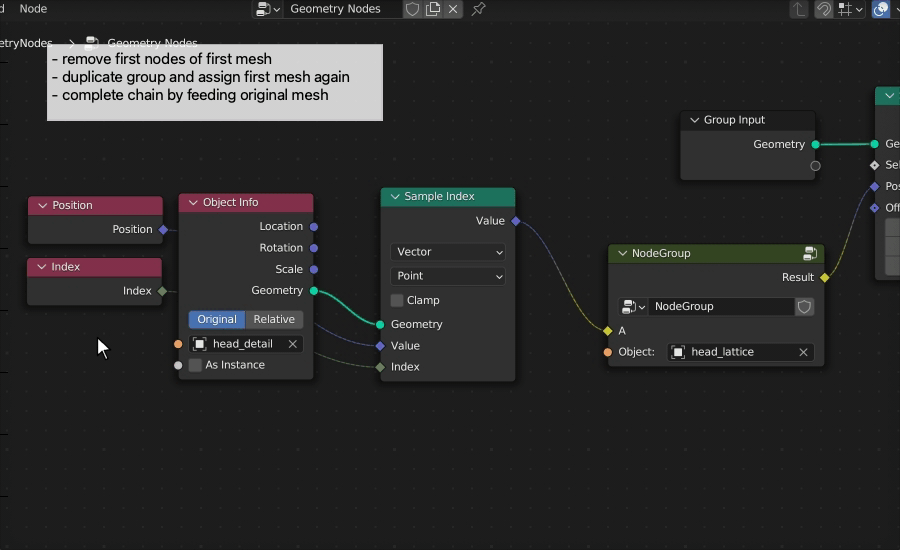
Now its ready for chaining. We replace first layer nodes with the group by cloning our first group and assign firt source mesh. Then we connect each layer starting from original mesh. See gif below.
Almost perfect, see results below.
As bonus we can also add blending factor for changing influence each layer. To do this we simply expose ‘factor’ from add and subtract nodes.
That’s it. Hope you find this useful for your rigging projects. You can find tutorial files here.